

The
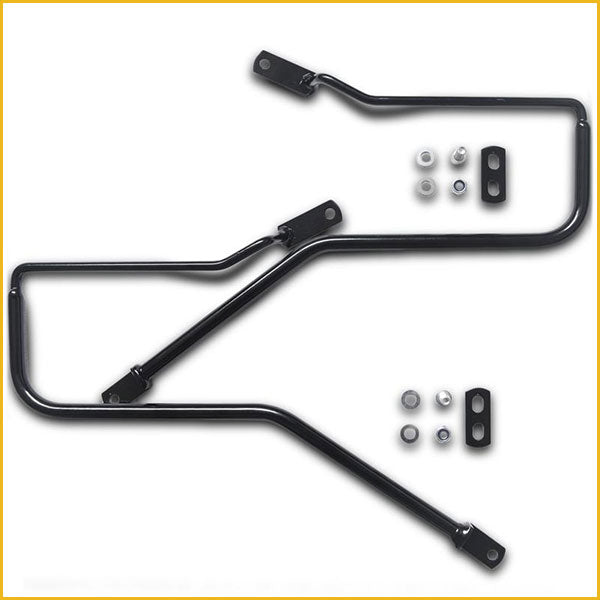
Royal Enfield 650 panniers rails are designed for the Interceptor 650, and the Continental GT. You can use them as standalone pannier rails, with any type of soft luggage. But they are also compatible with our
3 luggage mounting systems.
We believe our saddlebag holders for the Royal Enfield twins are the best out there. The most stealthy, stable and well designed.
Their installation relies on 3 mounting points : the silencer bracket, the shock absorber and the passenger rail. It will deliver a very sturdy support for your luggage wherever you go.
You will find below a step-by-step video guide by 'Youtuber' Stuart Filligham, and a written version for those who prefer to read.
SUPPORT BRACKETS INSTALLATION.
You will find in your kit 2 short support brackets, a left hand one, and a right hand one. To figure out their positions, the fixing points are under the passenger grab rail, and the perpendicular bit that will later connect to the actual saddlebag holders should be pointing upwards.
Undo the 2 bolts located under the seat and secure the support brackets without tightening too much at this stage. Always try using back the original fasteners throughout the installation.
Please note that installing those rear support brackets is optional, but they do offer a very sturdy setup for your luggage.
TOP SHOCK BOLT REMOVAL.
Remove the top shock bolt. The shock absorber is mounted on a post, and the bolt only prevents it from slipping off that post, so removing the bolt is safe. The stock bolt should be long enough and ready to be re-used.
SILENCER BRACKET FIXING POINT.
The third fixing point to locate is on the silencer attachment bracket. Often, you would use the foot peg mount that is nearby, but we found that the silencer bracket works best for the Royal Enfield Twins.
If at the end of the installation, the saddlebag holder is inclined rather than parallel to the seat, it probably means that you used the foot peg bolt instead of the silencer attachment mount.
Remove the silencer mounting bolt while supporting the silencer in case it drops. Put the pannier rail in place on the outside of the exhaust mounting bracket. Secure the bolt and nut back in, but don't fully tighten yet, as we might need a bit of movement for the last adjustments.
SECURING THE RAILS TO THE SHOCK AND BRACKETS.
Align the pannier rail on the top shock and insert the original bolt. Don't fully tighten it up, and turn your attention to the rear support bracket.
You will find in the kit short bolts and washers to secure the pannier rails and the support brackets together. Since you haven't fastened anything too tight, you should find it easy to line these up. Don't fully tighten yet so you can start from the bottom.
TIGHTEN ALL THE BOLTS.
Time to tighten everything up.
Start with the silencer bracket attachment, and the top shock absorber fixing point. Then tighten up the grab handle bolts, and finally tighten up the bolts that secure the support bracket to the actual pannier rails.
ADD SOME SADDLEBAGS TO YOUR ROYAL ENFIELD.
Time to mount road trip worthy saddlebags to your Royal Enfield 650.
You will find the
best saddlebags for your Interceptor, or Continental GT here.
Remember that the Royal Enfield 650's stock exhaust are high, leaving little room for luggage. Thankfully, the design of our pannier rails allows you to install great saddlebags without any modifications required.
For the largest saddlebags, such as the Super Patriot from Longride, you will need to specifically choose the Super Patriot SK, with the Sidekick mounting system, and slightly incline your saddlebags.
Want to see what the Longride luggage looks like on different Royal Enfield?
Discover the
photos sent to us by our Royal Enfield customers.